In some ways it's understandable, if you don't have some idea of how the print process works you're probably not going to understand how to set your pages up correctly.
First things first, don't use Microsoft Word to produce a file unless it's just going to be text. If you want a proper print job use proper print tools. Get a hold of Quark Xpress, InDesign or Affinity Publisher - all are capable of producing professional quality print work.
Step one - Speak to your printer.
This is the step most people forget (or ignore). It never ceases to astounds me is the number of people preparing their documents without have spoken to their intended printer or even knowing who their printer will be!
To make your print file correct it's important to understand how the document will be printed and how it will be finished. It might be saddle stitched (like a booklet), perfect bound (like a magazine) or hard (case) bound like a book. Each of these will require a particular way of laying out the pages.
Here's things the printer will be able to tell you.
1) Dimension requirements including bleed if required
2) File resolution
3) Colour settings for proper colour reproduction (most will have a colour settings file you can use)
4) Colour space (RGB, CMYK)
5) How it will be printed (digital, offset etc)
Armed with this information you can now start to plan your document. Here' some things to ask yourself.
a) Do you want the document to bleed (spill image off the page)
b) How many pages do you need - keep in mind for saddle stitched booklets you need to work in multiples of 4
c) Will you have spreads across th gutter of a book/booklet
d) How do you want it bound
I'm going to walk through the settings of a new document and explain each item.
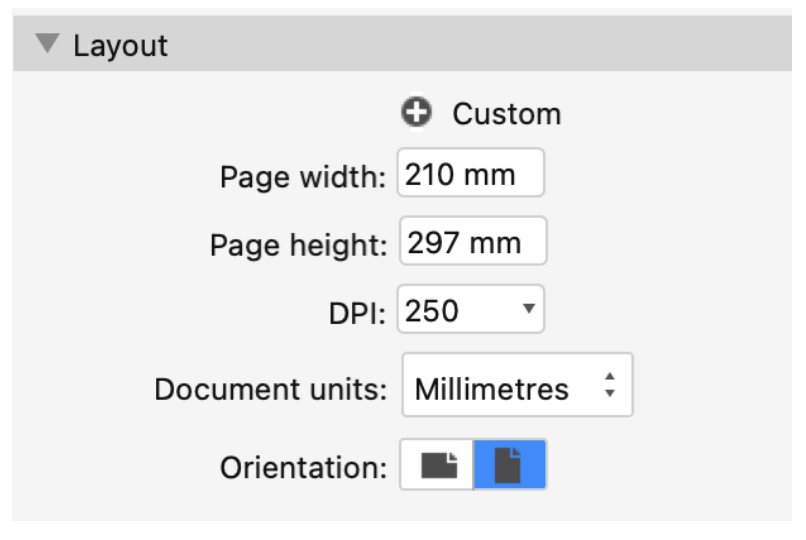
Layout
Here's the layout settings panel from Affinity Publisher (I should note I'm an InDesign guy rather than AP but I don't have InDesign on this machine).
First set the document size - in this example I've chosen A4 portrait at 250dpi with units in millimetres.
A quick mention on resolution here. Some folks believe you need to set every document to 300dpi but nothing could be further from the truth. There are times when 300dpi is perfectly fine, but check with your printer first.
Your printer can suggest a resolution which will be based on the line screen they'll be using to print. A general rule of thumb is dpi should be 1.5x - 2x the screen ruling used. Eg, 100 line screen needs 150 dpi etc. Now, the reality is you only need about 1.5x rather than 2x but as different people are often working on the photos and the layout, making the images 2x the line screen gives the layout artists some scope to scale the images up without having to go back and do them again. If you're producing both the images and layout this shouldn't be an issue.
Once again, ask your printer. He will not be pleased to get a 100 page document which is 3 times the size it needs to be because someone told you 300dpi was 'best'.
If you're REALLY worried about the results, do this. Get a quality RAW image and correct it for colour and exposure. Crop it (to the size you want to print) at 100dpi, 200dpi and 300dpi. Take a look at the difference from NORMAL VIEWING distance. Choose the lowest resolution where you can't tell the difference from the highest resolution.
Pages
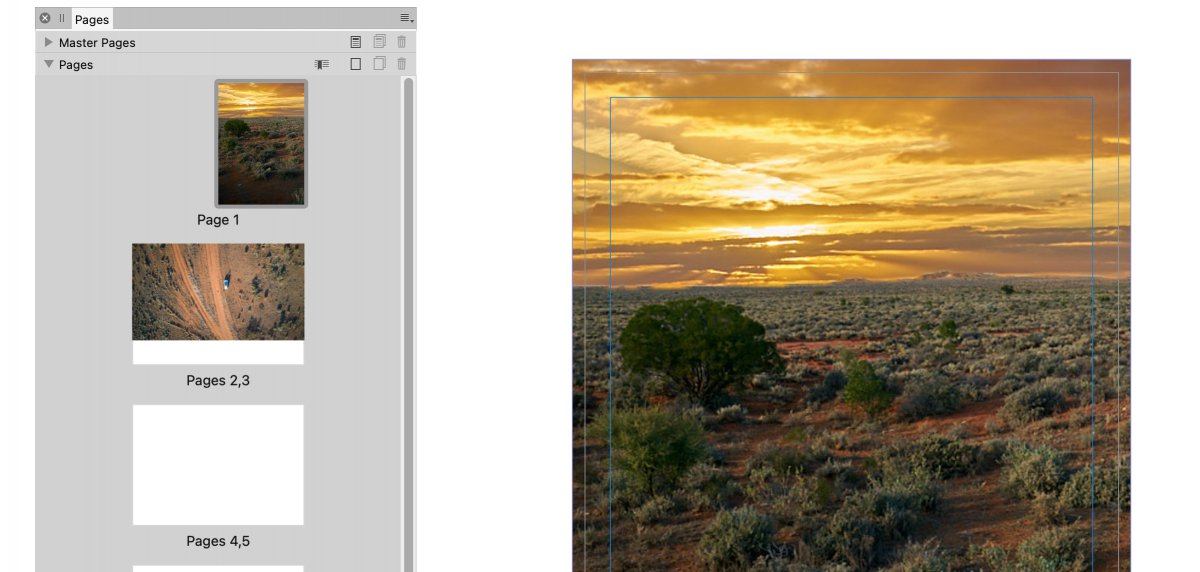
Here's the pages panel from Affinity Publisher - this is where you tell the program how many pages you want in the document. For flyers this will typically be one (or two if you're printing both sides).
Facing pages means you will have a single starting page and then all subsequent pages will be grouped into pairs. At the end you will have another single page which is the back. If you are doing a basic book which doesn't have content crossing the spine, you can leaving facing pages off and work with single page layout.
If you want to have content across double pages, turn this on.
Start on means you can specify which side the leading page will be. For typical left to right reading books this would be right.

Here is an example of a book with facing pages turned on. Note the first page is single and the following pages are grouped in pairs.
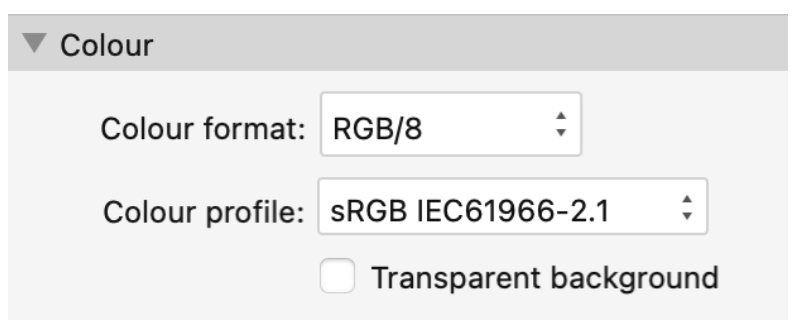
Colour
Once again, ask your printer for the colour specs. You can guess but don't expect to get a colour accurate result.
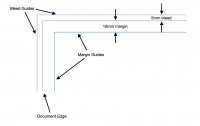
Bleed and Margins
The things many people get wrong.
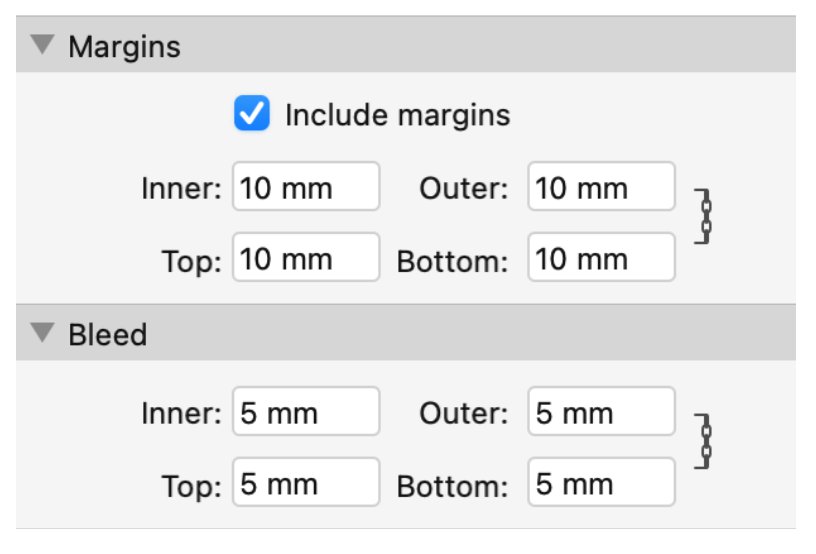
Margins are the gaps between the document edge and the document content - text and illustrations.
Bleed is an area which extends beyond the document edges to allow the printer to print over the edge and trim later
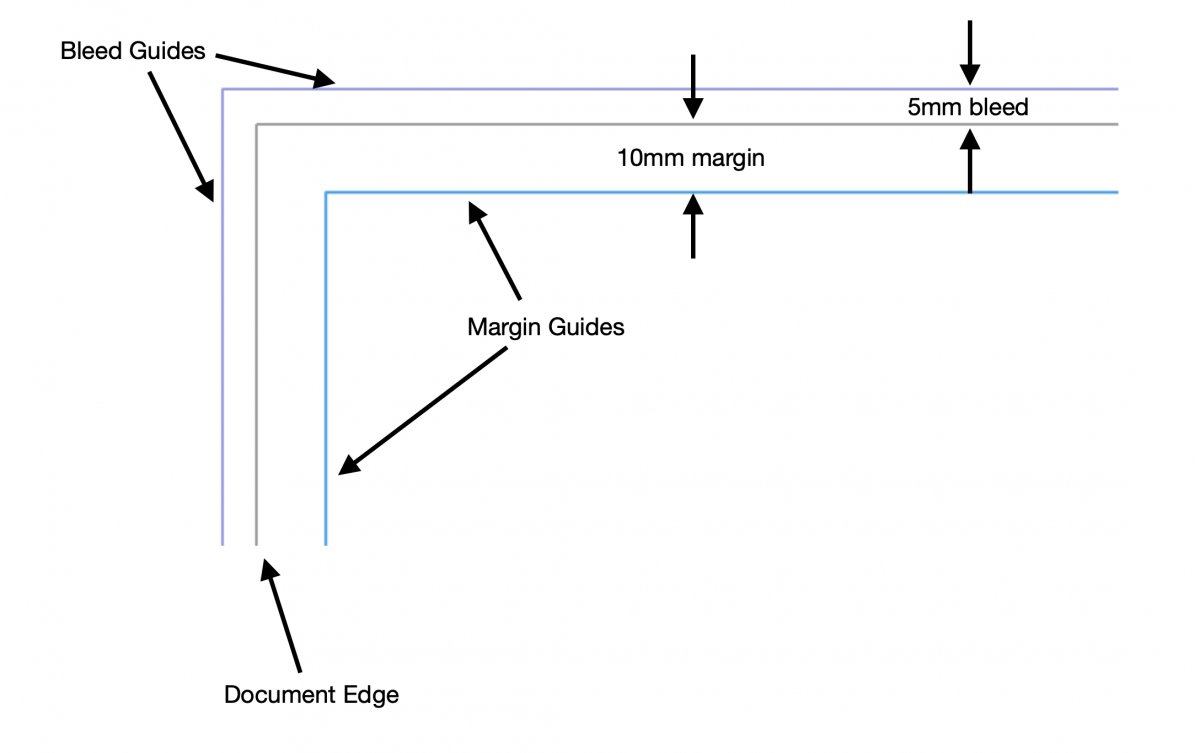
Inner and Outer refer to the spine (Inner) and the for-edge (Outer). Here's an illustration of the document described in the Bleed and Margin panel above.
If you don't want bleed, this greatly simplifies things. You can set your pages to the final size of the job and add a small margin so you don't have image too close to the edge of the sheet,
If you want your images to bleed off the page, ask your printer about how much bleed they require and make sure to set the proper amount in the document. You then have to ensure when exporting the file you have the appropriate bleed settings turned on.
Here's how the document and content would look if no bleed is required.

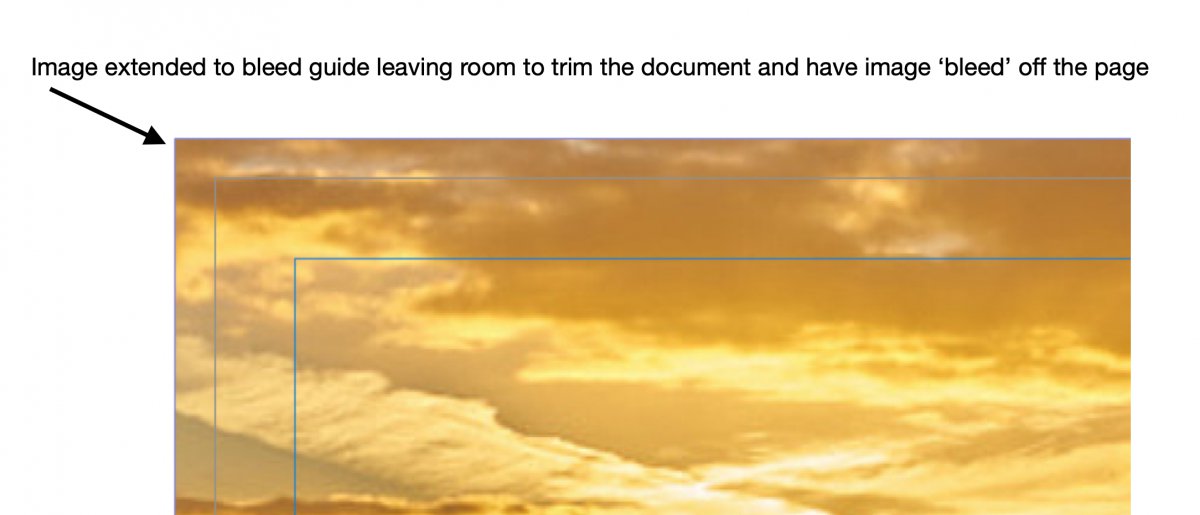
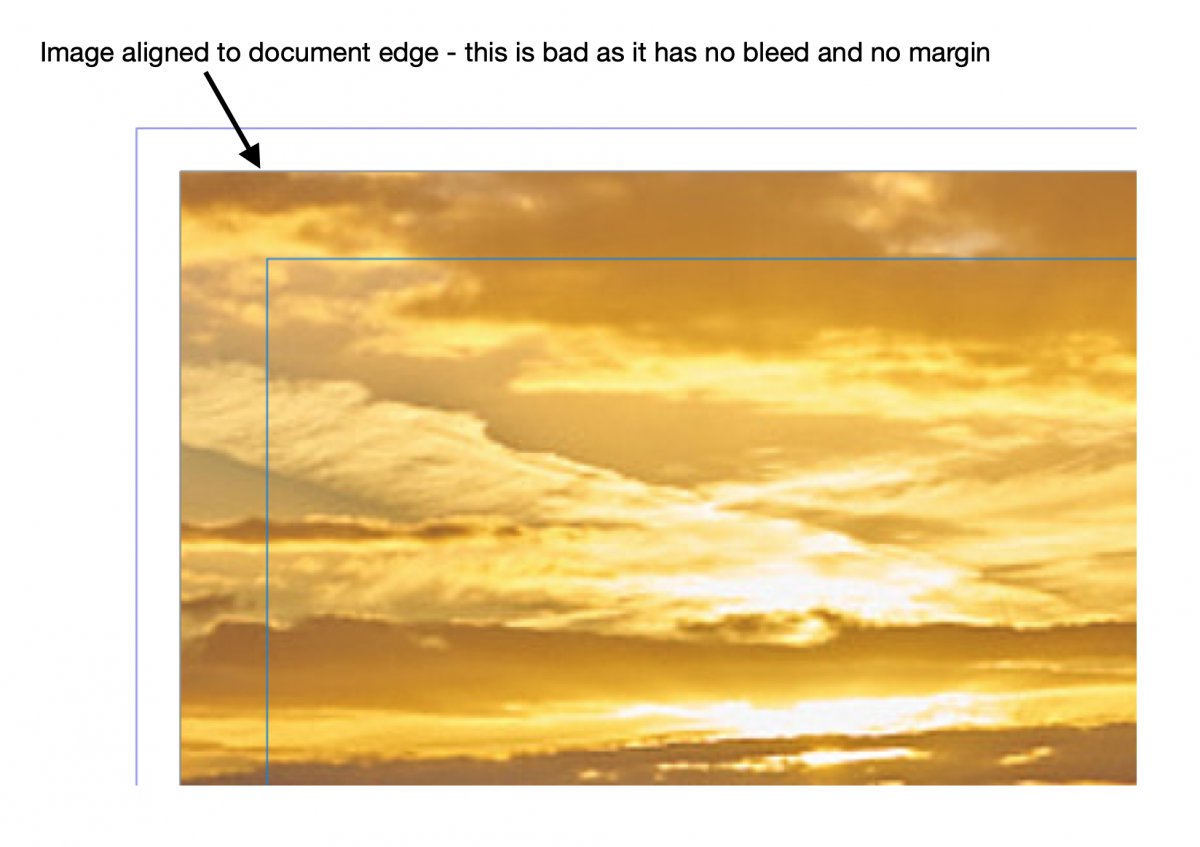
The following is how a WRONG document would look. It has image all the way to the document edge but not enough for bleed - this is a butt fit and is pretty much unusable. It either needs to be made to bleed or reduced down so it can have a margin.
Finally, this is a document with correct bleed applied. Note how the image extends all the way to the bleed guides. The document can be printed like this and then trimmed to the document dimensions.